How to Uninstall StartAllBack Properly: 6 Simple Methods
The key is to first disable StartAllBack from startup and the current user profile
3 min. read
Published on
Read our disclosure page to find out how can you help Windows Report sustain the editorial team Read more
Uninstalling StartAllBack can sometimes be a bit tricky, but don’t worry, we’ve got you covered with several methods to make the process as smooth as possible. The key is to disable StartAllBack from Startup on Windows 11 first. We have a guide on how to disable startup apps. After you do that, continue with the solutions below.
How do I uninstall StartAllBack?
1. Disable StartAllBack from your profile
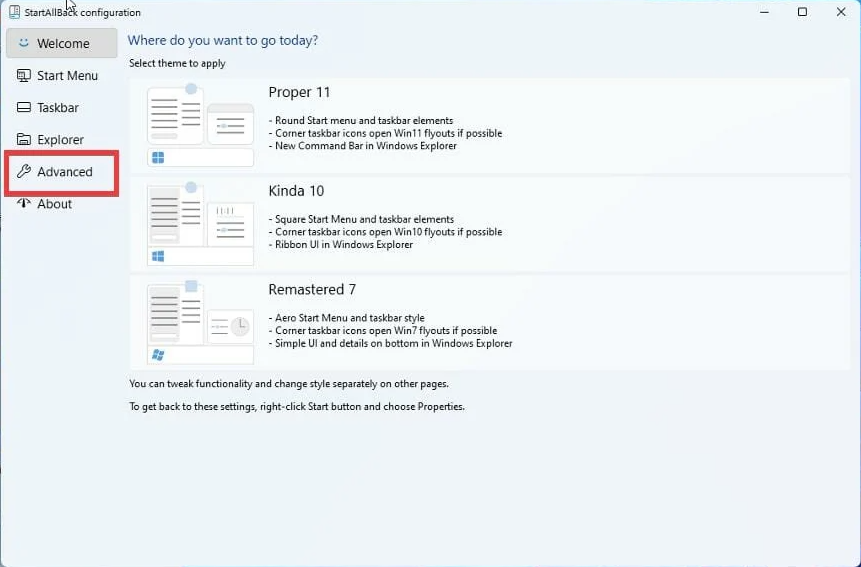
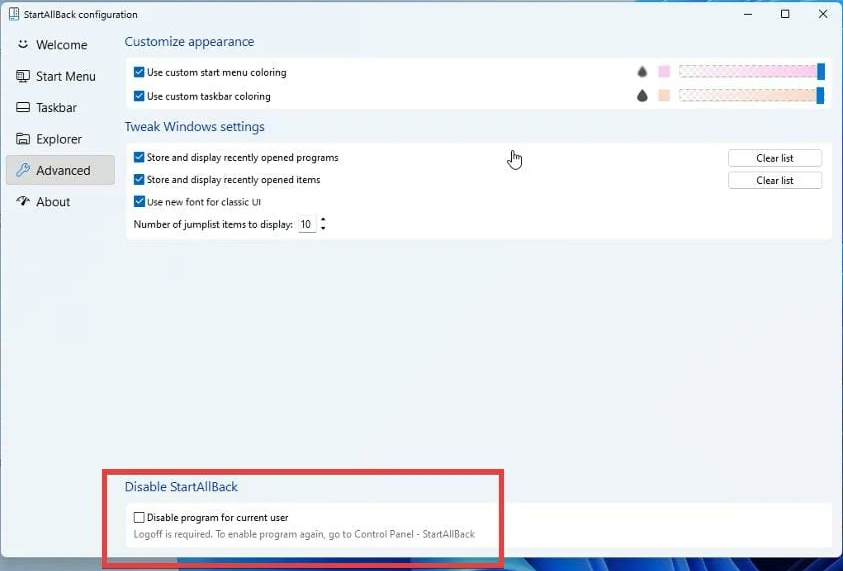
- Go to the Advanced tab on StartAllBack.
- At the bottom of the window click on the Disable program for current user box.
- Now, sign off from your Windows profile and sign back in.
After disabling StartAllBack from startup and from the current user profile, you should be able to uninstall it quickly and properly. We also have a complete guide on how to disable StartAllBack for more information.
2. Uninstall StartAllBack via Settings
- Open the Start menu, type apps and features and click on Installed apps from the results.
- Scroll through the list to find and click on StartAllBack.
- Click on the three dots to its right and select Uninstall to initiate the uninstallation process.
Using the Apps and Features method is a straightforward way to uninstall StartAllBack if it appears in your list of installed apps.
3. Uninstall StartAllBack with its Uninstaller.exe
- Navigate to the installation folder of StartAllBack (usually in C:\Program Files or C:\Program Files (x86)).
- Locate uninstall.exe or uninst000.exe.
- Double-click the file to start the uninstallation process.
Running the uninstaller directly from the installation folder ensures that the program’s own uninstaller removes all components.
4. Uninstall StartAllBack using the Run command
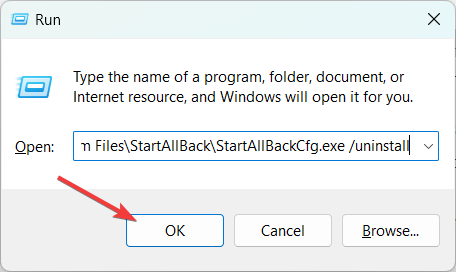
- Press Windows + R keys to open the Run command dialog.
- Copy and paste this uninstallation string and click OK or hit Enter:
C:\Program Files\StartAllBack\StartAllBackCfg.exe /uninstall - Follow the instructions to complete the uninstallation.
This method involves using the Run command to run the uninstaller directly, which is useful if you can’t find StartAllBack in your app list.
5. Uninstall StartAllBack in Safe Mode
- Press the Power button at the Windows login screen or in the Settings window, then press and hold the Shift key and click Restart.
- Select Troubleshoot > Advanced options > Startup Settings > Restart.
- Press F4 to enable Safe Mode.
- Follow any of the uninstallation methods listed above.
Booting into Safe Mode ensures that minimal system processes are running, making it easier to uninstall problematic software.
6. Manual removal via File Explorer and Registry Editor
- Navigate to the installation folder and delete all StartAllBack files.
- Press Windows + R, type regedit, and press Enter to open the Registry Editor.
- Navigate to HKEY_LOCAL_MACHINE\Software\ and HKEY_CURRENT_USER\Software\ to find and delete any entries related to StartAllBack.
Manually deleting files and registry entries should be your last resort, as it involves more steps, but it ensures a thorough removal.
You may also use professional uninstaller software that will solve this issues a lot quicker for free or for a small fee.
By following these steps, you should be able to uninstall StartAllBack without any hassle. StartAllBack is known to cause black screen issues on Windows 11, but you can fix that with the highlighted guide.
For more questions and suggestions, don’t hesitate to let us know in the comments below.

